Posts Tagged ‘gluten-free’

A Flavorful Take On Christmas Cookies

Gluten Free Eggnog Sugar Cookies


Heris a gluten fre version of one of our favorite Christmas cookies (original version from a favorite cookbook “Christmas Treats & Sweets”).


1 c. Butteflavor shortening

1/2 tsp. Salt

2 c. Sugar

2 tsp vanilla extract

1 tsp. Rum extract

1/4 tsp. Nutmeg

2 large eggs


2 tsp baking powder

3 to3 12 c. Gf all purpose flour (with xanthan gum or guar gum in theblend)


Using aa mixer, cream together shotening, salt and sugar until light and fluffy. Add flavor extracts and nutmeg and mix in, add eggs 1 at a time mixing between additions. Add baking powder and then add flour slowly 1 cup at a time mixing  between additions. Dough will be very thick, but not crumbly. Chill or allow to rest for 1 hour..  Prepare an area to roll out cookies with psrchment, foil or wax paper sprinkled well with gf flour and well spinkled rolling pin also. (Alternately, if you want round cookies, you can hand-roll walnut sized balls of dough in colored sugars, plsce on baking sheets and gently flatten with the bottom of a glass..)  Roll out about 3/8 inch thick and then cut out cookies with your fsvorite cuters.  Bake at 350 F for 12 to15 minutes or so, or until the edges are just browning and cookies aresoftly2 cS set.  Bake a bit longer if you like crispy cookies.   Cool on pans 5 minutes before removing to a cooling rack.  When completely cool, decorate as desired with ffosting and  sprinkles. 

SuavI

The Adaptable Pumpkin Pie


Happy Thanksgiving y’all!

   The daily management of meals is complicated for families with multiple food allergens.  When the holidays arrive, the stresses of meal management multiply to seemingly a thousand-fold.  This year our holiday meal issues will include managing for the following foods issues: 2 people who are allergic to milk and bananas, 1 person who can’t eat foods with gluten, 1 person who’s allergic to soybeans and avocados, 1 person allergic to strawberries and 1 person who’s diabetic.  This traditional pair of Thanksgiving recipes is written toward persons with these food allergens and with substitution suggestions for the diabetic too.

A Little Schoolhouse On the Prairie Moment (aka An After-schooling Lesson):  Allow your children to help you with your holiday baking.  The youngest toddlers will have fun with a bowl and wooden spoon, older toddlers and preschoolers can help w/ cookie cutter decorations and stirring.  Older kids get an arithmetic lesson in measurements and fractions when they help measure and stir the ingredients together and can practice understanding temperature by setting the oven to preheat at the correct temperature.  Ask your teenagers/preteens to convert temps F to C and measurements to metric system for fun or research for the family the origins of various holiday foods to share this information with the family during the meal.

Traditional Pastry Crust

(A Gluten-Free/Soy-Free/Dairy-Free

adaptation of my grandmother’s pastry crust)

*This recipe makes a 2 crust pie or 2 one crust pie plus extra to be used for decoration

1 cup Spectrum Palm Shortening (or lard… grandma always used Crisco, plain or butter-flavored)

     *if using lard, chill it in the freezer for an hour or two prior to use.

 3 cups Gluten-Free All-Purpose Flour blend w/ xanthan gum already in it (I like Jules Gluten-Free Flour or Namaste Perfect Blend flour) or more as needed

    *amount of flour needed will vary due to natural moisture in the flour blend and the type of “shortening” used, lard is softer and will need more flour to make a good crust, however, it’ll also make a little bit larger batch.

1 tsp. salt

1 tsp. cider or rice wine vinegar

Ice water

   Place  flour, salt and shortening in a large mixing bowl.  Cut the flour mixture into the shortening with a fork or pastry blender if doing it by hand.  I prefer a more mechanical method for the sake of speed.  I place these ingredients in the bowl of my Kitchen Aid stand mixer and cut the shortening into the flour using the whisk attachment.

Add the vinegar and mix well (many of the gluten-free recipes I have come across in the last 2 years for baking have contained a small amount of vinegar with the explanation that it helped somehow activate the xanthan gum that is used as a binder to replace gluten???  Not sure if that’s right or not, as what I know about xanthan gum is that it activates in most liquids, but I liked that the tiny amount of vinegar gave the crust some pleasing  flavor, as it was otherwise a little blah to me after using butter flavored Crisco for many years.)  Add the ice water very slowly by the teaspoonful, mixing well between additions.  You will find this recipe needs less liquid than your typical wheat-flour based pie crust, especially if you use lard in place of shortening.

Once mixed, divide dough into 2 portions.  Form into 2 discs and wrap in parchment or wax paper and chill dough for several hours in the fridge.

Remove from the fridge.  Line the surface on which you are rolling out your dough with parchment or waxed paper.  Sprinkle the paper with tapioca flour or cornstarch.  Place your disc of dough in the center of the paper and sprinkle this with tapioca or cornstarch too.  Place another piece of parchment or waxed paper on top.  Using your rolling pin, roll out dough into a thin sheet.  Remove the top layer of paper and gently lay your pie plate on top of the dough upside-down.  Carefully and gently flip the plate and dough over together.  Press the dough down into the pie plate gently then cut away excess dough with a knife.  Crimp or flute the edge of the pie using your favorite method.  Shapes may be cut out of excess dough using cookie cutters to place on the pie after it is filled with it’s filling.  Try leaves, pumpkins, acorns etc for Thanksgiving or stars, mittens, trees, reindeer etc. for Christmas.

*For a 2 crust pie, repeat the dough rolling instructions for the 2nd crust after filling the pie with it’s filling, then crimp or flute and decorate.

** For a pie shell that is to be filled with a chilled filling, place the  crust in the pie plate, prick crust w/fork to prevent air bubbles, then cover with foil and fill the crust with dried beans or pie weights.  Bake at 350 F for 20 to 30 minutes (depending on your oven).  Cool and fill with chilled filling or wrap tightly in plastic wrap and freeze for later use.

Traditional Pumpkin Pie

Gluten-Free/Casein-Free/Soy-Free

with low-sugar suggestions

Pie Filling:

1 (15 oz) can solid pack/pure pumpkin puree (or if you prefer, roast a pie or heirloom pumpkin in your oven, scoop out flesh and use this in place of canned pumpkin– directions to follow at the end of the post.)

1 cup sugar (or 1 cup Splenda/Sugar blend or 1 cup Stevia in the Raw, if using sugar substitutes, plan to keep this pie chilled in the fridge to prevent it from molding if making it ahead or if you have leftovers)

1 can (15 oz) coconut milk (unsweetened)

3 eggs

2-3 teaspoons ground cinnamon (to taste)

1 tsp.ground  allspice

1 tsp. ground ginger

1/2 tsp. ground cloves

1/2 tsp. ground nutmeg or mace

In a large mixing bowl, mix sugar (or substitute) and eggs with a whisk until well blended.  Add pumpkin puree and whisk until well blended. Pour in coconut milk and once again mix in very well with a whisk.  Stir in spices until thoroughly mixed.

Pour into your prepared pie crust.  Decorate top of your pie as desired, sprinkling top of decorative crust pieces with a little granulated sugar or colored sugar sprinkles for sparkle.  Bake at 350 F for approx. one hour (or maybe a little longer… you want to bake until the filling appears to have set up since this is a “custard” type pie) depending on your oven.  This crust does not brown quite as much as a wheat flour based crust, so personally, I’ve been able to skip the step of covering the edge of my crust with foil and baking at 2 different temperatures.

To Make Your Own Pumpkin Puree:

    Choose pie pumpkins or small to medium sized heirloom pumpkins (the green Jaradale and the light orange and dark red-orange “Cinderella” pumpkins are among my favorites for this).  Depending on your timing, you can cut the pumpkins in half, scoop out the seeds and place cut side down in a baking pan with a little water in it and bake for 30-60 minutes (depends on size of pumpkins) or until tender when pierced with a fork. Remove from oven and allow to cool.

OR

knock the stem off your pumpkin(s), wrap the whole pumpkin(s) fully in foil and heat your oven to 200 F, place wrapped pumpkin(s) on a cookie sheet(s) and place in the oven before going to bed, allow pumpkin(s) to slowly roast ovennight. Check to see they are tender first thing in the morning and remove from the oven to cool.  When cool enough to handle, cut in half and scoop out the seeds.

For both continue as follows…

Scoop out flesh with a large metal spoon and place into a large bowl or the bowl of your food processor (this may need to be done in several batches).  Mash puree by hand with a fork or potato masher or puree in a food processor.  Set aside the amount needed for your pie or other recipe.  Portion the rest out into 1 qt. freezer bags and freeze for later use.

This roasting, mashing and freezing process also works with other types of winter squash and is an excellent way to preserve the squash crop from your garden.  (Summer squashes can be grated raw and frozen for later use as well.)

Mystery Recipe Monday- July 9, 2012

Okay everybody, I know it’s been quite a while since we have done the Mystery Recipe Monday thing… but I really feel like we should get back into the habit once again.  All of you really seem to enjoy it when I post recipes, as we get lots of visitors and regulars who stop by to see what the “good lookin’  Modern Pioneers have got cookin’!”  Many of you will remember parts of that line from a Hank Williams Sr. song entitled “Hey, Good Lookin’, Whatcha Got Cookin’!”

Today we have something really good lookin’ a-cookin’ in the Modern Pioneer Kitchen. (Oh, and it’s also really good tastin’ too!)  I (Modern Ma) am so delighted with my newly remodeled kitchen that I have been itching to get in there and really put this beautifully functional and just plain beautiful work-space to hard work. We finished this huge home improvement project (stay tuned for several upcoming DIY posts about remodeling a farmhouse kitchen on a budget), just in time… for a monumental heat wave… OF COURSE!  So the past couple weeks have been mostly salads and foods that can be cooked via microwave, such as turkey enchiladas made with ground turkey I had            pre- cooked and frozen for later use and Spanish rice made with leftover rice I had also frozen as an easy prepare staple for hot or busy evenings.  Due to the heat-wave, Pioneer Pa and I decided to put off having an anniversary cake until the weather cooled (our wedding anniversary being June 29th and being as this one is #10, I felt like I ought to do a special dessert.)

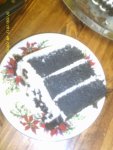
Having seen a variation of Red Velvet Cake done in blue by the Betty Crocker test kitchen , I decided try my hand at a beautifully decorated Gluten Free version of my own variation a Black Velvet Cake (okay I was actually aiming for a Royal Purple Velvet, Pa’s favorite color being purple… but alas I was completely out of both red and purple food coloring… trying to use up much of my old Wilton gel food coloring before the kiddos return home)… so I did it with black food coloring which I had a lot of (if you think red and yellow food coloring makes little boys hyper-active, try giving them black food coloring! Grab a putty knife and prepare to scrape those boys off your ceiling!).  Yes, Black Velvet Cake, sounds very “Elvis Presley”, but it should be very beautiful and dramatic (is anything quite so elegant as a black and white cake in the world of desserts?)… quite suitable for a 10th Wedding Anniversary.  Especially considering that we had a Christmas In June Wedding, which was also quite stunning and dramatic in it’s own right.

So, now for our Mystery Recipe Monday recipes.
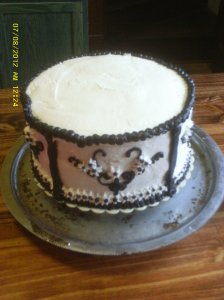
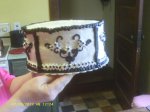
Black Velvet Anniversary Cake

(A Special Gluten-Free Dessert for Special Occasions )

*WARNING– This cake is NOT FD&C DYE FREE and NOT DAIRY FREE

2 pkg. Betty Crocker Gluten-Free yellow cake mix

6 large eggs

2/3 cup. canola oil

1 TBSP Cocoa Powder, leveled

1 cup plain soy or almond milk

1 tsp. cider vinegar

1/2 cup water

1/2 of a large jar of Wilton Gel Food Coloring (Black)

Prepare cake mix, as per manufacturer’s directions, adding the cocoa powder into the cake mix before adding the wet ingredients. Substitute the soy/almond milk, vinegar and 1/2 cup water for the water called for on the box.  Mix in food coloring

Grease  four 8 inch or three 9 inch  round cake pans and divide the batter equally among the pans.  Space them equally in the oven on both racks and bake at 350 F for 30 to 40 minutes or until a toothpick test comes out clean.  Remove from oven and cool in the pans on a cooking rack until about room temp. If your cakes mound up in the center, you can level them once they are removed from the pans with a serrated bread knife.

Place bottom layer on a cardboard circle or a  cake plate/cake stand. Fill with cream cheese icing or another favorite filling (such as raspberry or blackberry jam, or both jam and cream cheese icing together would be lovely, 2 layers of filling).  Place next layer on top of  bottom layer, leveled-side down, and once again fill between layers with icing or favorite filling.  Repeat for 3rd and 4th layers.

To seal in crumbs, thinly frost cake w/ room temp. cream cheese icing, starting at the top center and working out toward the top edge and then down the sides with a large angled (off-set) metal spatula.  TIP: If you have a rotating cake stand or a lazy-susan from your spice cabinet, place your cake plate/round on it and use this to smoothly turn the cake as you frost it… this makes the job a little faster and easier and usually results in a more professional looking cake.

Once cake is crumb-coated, place in the fridge for about 2 hours to set the icing.  Remove from fridge and frost cake again so that cake does not show through the icing.  Return to fridge for about 2 hours to set again.  At this point,you can either serve it as is or decorate it with contrasting tinted icing using a piping bag and decorating tips for a special occasion such as a birthday anniversary or even small wedding or wedding shower. Once again, allow a couple hours in the fridge for icing to set, especially in the summertime, it will solidify the shortening/cheese mixture that is the basis of your icing and prevent all your hard work from sliding down the side of your cake.

Cream Cheese Decorator Icing

(Note: if you have a stand mixer, definitely use it for making decorating icing, as this type of icing is quite thick.)

8 oz pkg. cream cheese, room temperature

3/4 cup vegetable shortening

3 lbs powdered sugar (approx. as moisture levels in this product can vary, adjust as needed)

2 tsp. double-strength vanilla extract

1 to 2 tsp. rum flavoring

1 tsp. raspberry flavoring

2 to 3 TBSP Almond or Soy milk

Using an electric mixer (stand type if you have one), cream together the cream cheese and shortening.  Slowly add in sugar1/2 cup at a time, beating well between additions.  After adding 1/2 of the sugar, add in the flavoring extracts and 1 TBSP of milk.  Mix well.  Add more sugar, a little at a time, until most of it is in the icing.  Add another TBSP of milk then finish adding the sugar.  Adjust thickness of icing by adding more sugar or milk as needed for a spreading consistency to ice the cake with.  To make stiffer icing for piping decorative designs and borders onto cake, thicken with more powdered sugar.

To make black decorator’s icing (that doesn’t taste like ink), darken your icing with baking cocoa (powder)… this will also thicken consistency slightly, then begin adding black gel food coloring until desired color is reached mixing color in between additions (let stand 5 to 10 minutes when color is a shade lighter than you think you want, as they sometimes darken a little in a buttercream/cream cheese style icing with time.  You can always add more color, but you can’t take it away… you can add more “white” icing, but you may end up with far more than you need.)

You can find Wilton Cake Decorating supplies at many local discount or craft stores (such as Walmart, Ben Franklin Crafts or Hobby Lobby) or at http://www.wilton.com .

To decorate the cake above:

1. Using black icing in a disposable decorating bag fitted with a coupler and a #2 round tip to  pipe a pretty scroll design on the sides of the cake, which I repeated 5 times around the side of the cake. (I used a tool I’ve had for years called a pattern press to mark my scroll-work, this product is no longer available unless you get lucky finding one in a thrift shop, but you can find a design or clip-art you like, print it out and trace it onto waxed paper and then use the wax paper to position the design and mark the design onto the cake using a toothpick to prick the wax paper and leave marking on your cake icing.)

2. Using Tip #107 and white icing in another disposable decorating bag fitted with a coupler, pipe drop flowers onto the scrolling vines.

3. Using the black icing and #2 tip again, pipe dots into centers of flowers.

4. Using  a #10 tip and white icing pipe a line of white icing around the base of the cake at the plate.

5. Changing black icing bag to a #97 ruffle tip or a #104 rose tip, fat end up, pipe a ruffled border at the base of the cake on top of the line of white icing (this will help it flare out like a ruffle), wiggling up and down slightly as you pipe around the cake.

6. Changing black icing bag to a #10 round or a # 32 star tip, pipe a ball border or a shell border on the top edge of the cake.

* Refill our decorating bags with icing as needed as you go, leaving  enough room to twist the bag closed at the top so icing does not squish out the top and make a huge mess.

For more complete instructions on these decorating techniques, please check out the Wilton link above or consider purchasing a very basic starter kit from Wilton locally.

You might even be able to find cake decorating class locally that you can take (possibly with your spouse if he’s interested, or with one of your kids… most 7 or 8 year-olds are plenty old enough to learn cake decorating with parental supervision.)  My mother took the first two courses in a local Wilton Decorating class and taught me at the age of 5 while she was practicing at home.  As a teen, I self-studied the more advanced classes.

For Pioneering Families in this Modern Era,  the basics of cake decorating are a terrific skills to consider learning.  Not only is is a great, fun-filled family activity, it can also be a frugal, money-saving skill compared to the rapidly increasing costs of having a cake professionally decorated by a bakery… particularly when you are at a stage where weddings, anniversaries, baby showers etc. are frequently in order.

Re-engineering the Chocolate Chip Cookie Gluten Free

Well, it is the start of another busy day. Yesterday, I had to unexpectedly drive out to the kids’ school (60 miles round trip from home) to pick up Farmer Boy Charles, who wasn’t feeling well and who’s eye was all red and weepy. That brought me to an unexpected stop at the eye doctor, my boy has viral pinkeye (nothing doctor could do except ell him to wash hands frequently, not to rub it and keep hands to himself.) So, he’s at home until the problem passes.  Hope it doesn’t take as long as it did with my goats back in the fall of 2006, when they got exposed at State Fair to it (exhibitor in the neighboring stall had a doe down with it really bad and tried passing it off as allergies!  I was very upset, one of my favorite does, Vienna, went blind after rubbing up against that next-door stallmate.)

In the interest of a busy day and recipe days being our most popular days… we will literally keep this short and sweet.

Over the Christmas holidays, Charles requested Nestle’s Toll House Cookies after seeing frequent commercials on television for them.  Part of autism is a symptom called echolalia (affected people frequently parrot/repeat information they see or hear over and over ad nauseum to the point of driving everyone else completely batty.) When he was little he constantly repeated entire scripts of kiddie programs like Thomas the Tank Engine and Bob the Builder. Now that he’s getting older, Charles echolalia is evolving… he’s becoming very susceptible to advertising, particularly food advertising… which seems to peak during the winter holidays.

The constant bombardment by Nestle’s products resulted in this request for Toll House cookies. Not that I don’t frequently bake chocolate chip cookies anyway, but we had to go through this excercise to understand WHY these particular cookies were different or special by duplicating it Gluten Free

. (*Please note that  Nestle’s Toll House morsels are NOT dairy free, they contain milk fat and as a result a nominal amount of casein… I usually use Ghiradelli semi-swee choc. chips in baking or another dairy free brand … but in this instance I had some of the Nestle’s brand that I had bought to make fudge for hubby’s office and decided to administer enzymes to my son for casein digestion. )

I stuck very close to the original recipe with these cookies.

          Gluten Free Nestle’s Toll House Cookies

(An adaptation of a Famous Recipe for Gluten Intolerance)

Equipment:  large mixing bowl and electric mixer (or a heavy duty stand mixer like KitchenAid which is what I use and I usually double the batch size), wooden spoon, parchment paper, cookie sheets, cooling rack, a metal pancake flipper and a cookie scoop.

Ingredients:

1 cup butter or margarine (I use BestLife or Earth Balance)

3/4 cup sugar

3/4 cup brown sugar

2 eggs

2 tsp. vanilla extract

3 cups of Gluten-Free All-purpose Flour (if using a blend with xanthan gum already added, omit xanthan gum later in recipe.  I like Jules’ Gluten-Free All Purpose Flour  www.julesglutenfree.com , but  also have used Namaste GF All Purpose flour to good result in this recipe too, if you are new to GF and not sure what brands to choose.  I do not recommend a garbanzo/fava bean based AP flour in this recipe as it will result in “beany flavored cookies”)

1 1/2 tsp. Xanthan Gum

2 tsp. baking soda

1 tsp salt

1 pkg. Nestle’s Toll House Semi-Sweet Morsels (other one of the dairy-free brands)

1/2 cup chopped nuts (optional, if you have nut allergies either leave them out or use sunflower seeds or shredded coconut instead.)

Instructions:

Cream ” butter” and sugar until light and fluffy with an electric mixer.  Add eggs one at a time and mix well between additions.  Add vanilla extract and mix again.  Sift together dry ingredients, add slowly to butter mix mixing well between additions.   Add in chocolate chips and mix again and then add nuts and mix those in too if you are using them.

Preheat oven to 350 F.  Place cookie dough on cookie sheets lined with parchment using cookie scoop or by heaping spoonfulls. Bake 8-12 minutes depending on your preferred doneness and your oven until lightly golden (we like them soft and chewy here).  Allow to cool slightly (5 min or so) on sheets before removing to a cooling rack or platter.

Great warm or cold and served with a glass of milk substitute (almond, rice, soy etc.)

You can also make this dough in advance, form into logs and wrap in parchment or wax paper, place in a zip-top freezer bag for later use. just partially thaw a log of dough as needed  and slice off cookies and bake them as usual.  Great idea to have on hand for when the youngster forget to tell you it’s their turn for snack day at school or Sunday School until the last minute or for busy days when a sweet snack or dessert is wanted in a hurry.

Makes 2 to 3 dozen depending on size of cookies

March 19, 2012 is our 1st Mystery Recipe Monday

Starting today, we shall try to post a Mystery Recipe every Monday if possible. If you are a follower here, please stop by our Facebook Page and give us a like over there.  We are going to let everybody know when we’ve added a mystery recipe over there on the Modern Pioneer Family Facebook page before we publish it on here, so you all will be on the look out for our Mystery Recipe Monday posts.

Why, you may ask?  Well, to start that discussion, our recipe posts have been some of our more popular ones and some of our friends are asking for more recipes, maybe as a “regular feature” on certain days.  Another reason is if the recipe is posted as a “surprise recipe” perhaps curiosity will encourage more folks to stop by and check out this new blog.  SO… you ask “why” and I answer “why not”, sounds like fun.

And so… drum roll, please!  Without further ado… our mystery recipe for March 19, 2012 is:

Gluten-Free Sourdough Starter

Equipment:

You will need a mid-sized mixing bowl, a rubber/silicone spatula, measuring spoons & cups, a dish-towel and a clean glazed stoneware type crock w/ an old-fashioned bail top (those wire lid closing things like on antique canning jars) or a 1 qt. canning jar with a new lid and band.

Ingredients:

1 1/2 cups white rice flour (you can also use all brown rice flour if you prefer whole grain breads/rolls, or do what I do, make one of each.  I don’t recommend blending the flours in your sourdough starter, it’s easiest and works best if you keep it simple.)

1 TBSP sugar (use white, brown or maple sugar as you like.  This is not the place for sugar-free sweetener type products. Honey is also not a good idea here, as you could potentially get a botulism contamination problem going in your starter, you don’t want that. If you want to use honey, use it later in your bread recipe after you have doubled the starter and returned 1/2 to the sourdough crock.)

1 TBSP Dry yeast (go ahead and buy it in the jar or in bulk, if you are going gluten-free, chances are you will be baking lots of your own breads, rolls, buns and more. It will cost less in the long run NOT to buy the little packets.)

1 cup water (if you don’t like your tap water or if you have chlorinated water, use bottle drinking/spring water.)

Directions:

In mixing bowl, stir rice flour, yeast and sugar together.  Mix in room temperature water.  Set in a warm (but not hot) place to incubate overnight.  Check it occasionally and stir if necessary, just so it doesn’t try to climb out of the bowl and overflow (why create an extra mess to clean, right?)  If you like that real sourdough type taste, you can incubate the starter 1-3 days longer before parking it in your fridge. I like mine at the point it makes my bread actually taste like bread (and still neutral enough to make cinnamon rolls and the like) but that is only a personal preference.  And if you are feeding your bread to kids, when in doubt go with what they will eat… you can always slowly increase the “sour” quality so they slowly adjust to more grown-up flavors.

Pour your starter into a very clean crock or canning jar, put on the lid and place it in your fridge, until you are ready to bake bread, rolls, etc.

Care of your starter if not being used for a while:  If you know you won’t be using the starter for a while (say you are going on vacation for several weeks), get it out and let it warm to room temp and feed it 2 tsp. sugar and 2 TBSP of rice flour (add a bit of water if you think it looks too thick.)

Gluten-Free/Casein-Free Pumpkin Bread

Wow! What a busy day today!  Stopped at the electric co-op to pay that bill (that was pretty scary… they hit us with both a rate and a tax increase… bill was almost double what it was a year ago at the same time.)  Then to the thrift store (while waiting for the bureaucrats at the Social Security Admin Office to get back from lunch… I dinked around until 1:30 at the thrift shop, I was the ONLY person in there and it still took them 25 minutes to wait on me… seriously these people only work 5 hours a day, 4 days a week and are taking money out of our pockets in the form of taxes to pay their salaries… so you’d think maybe they could work a little harder???  Annoying.)

Anyway, my oldest Farmer Boy Charles, has suddenly outgrown nearly every pair of pants he had (around the middle, as he’s a stockily build laddie, just like his grandpa (my dad)… very likely will be much taller and broader than his father, as our Pioneer Pa is rather short with an average frame.)  Some of Charles’ dietary issues cause him to tend to bloat in the afternoon and that makes fitting clothing tricky.  Right now he just went from a size 12 husky to a 14 husky around the middle (of course at 8 years old, they are a mile long and must either be hemmed, but not cut off so we can let them out when he gets taller, or roll them up so that he doesn’t walk the excess length off his jeans.  So, I was at the thrift shop looking for him some pants.  Only found 1 pair of jeans in his size, so I snagged them and several pair of sweats/athletic type pants and found a couple pair for his little brother too.  Anna picked out a couple toys ( a rattle, a stuffed frog and a bucket & shovel) and a pair of sneakers to wear outdoors in the garden.  I found a couple chapter books I thought the boys would enjoy reading aloud, a beginner’s knitting book that I got as a gift for a friend and several nice old cookbooks (have I mentioned my cookbook collection yet???  Well, that is a long story for another night.)  Then over in the housewares, I found a couple nice glass bottles for making my own flavoring extracts, 2 stainless steel travel mugs for Pa and a syrup pitcher.

Then the stop at the SS Admin to just get Anna’s SSN (I know I have the card someplace, I remember it coming in the mail, I remember putting it away somewhere where I was supposed to remember WHERE I had put it… unfortunately, I can’t remember WHERE THAT WAS…  Is 36 years old, old enough to start having senior moments?  I wonder???)  Well, I just needed my little pioneer girl’s number so that I could finish my Fed. tax returns and get that sent in to the IRS.  That took OVER AN HOUR  and I wasn’t even applying for a replacement, doing a name change or anything complicated like that.  Dealing with the government drives me crazy.  (So tomorrow, I am cleaning house and spending quality time with TurboTax, until it’s time to meet the boys as school for their 1st 4-H meeting in their new club afterschool… have to fill out some paperwork to change counties.  Our old 4-H club was too inconsistant, always cancelling meetings or planning them at the last minute.  It didn’t work for Charles, he needs consistant and predictable time and place to be able to participate funcionally.)

After my oh so fun afternoon with the government employees at the SS Admin, then had to do my grocery shopping.  Stock up on staples we were out of and get some friuts, veg and meat (I hate buying meat in stores, but we are low on beef w/ 6 mos. to go before, Little Hector, our steer is ready for the freezer, low on cabrito, since we’ve not had an extra buck kid in 3 years, out of lamb and chicken and the hog we are buying from a friend won’t be ready until after Easter.)  Then arrived home about 15 minutes before the school bus.

After going through the backpacks, found out that spring pictures were rescheduled for tomorrow (got cancelled by a snow day).  So two young laddies had to have hair cuts.  Oldest wanted to keep the back of his “long” (it’s almost down to his shoulders right now)… Pioneer Pa was horrified that the boy wanted a MULLET, it was such a late 80’s/ early 90’s thing and considered such a redneck-rocker thing.  I didn’t care, Charles was good and he was happy and there was no screaming or freaking out about having his hair cut. (Big area of sensory issues in the past!  I’m totally proud that he’s come so far and cares enough about his person now that he’s even interested in choosing a hairstyle… I might have drawn the line at a purple mohawk though.)  After a long busy day and getting two boys ship-shape and bathed, then myself too… after 2 haircuts I was so covered in hair, I’d never be able to sleep for the itching… it feels fabulous to sit here and write and wind down for sleep.

So here it is (after all of my rambling on and on)  the promised recipe for my Gluten-Free/Casein-Free Pumpkin Bread that I baked yesterday.  Yeah that loaf is already totally gone! (My 3 fellas polished off the last of it for breakfast)

Gluten-Free/Casein-Free Pumpkin Bread

1 (15 oz) can Solid Pack Pumpkin Puree

1 stick of Casein-Free Margarine (BestLife and Earth Balance both work well)

1 cup of sugar

3 large eggs (or equivalant of egg replacer)

1/2 cup canola or safflower oil

2 TBSP ground flax meal

2 -3 tsp. ground cinnamon (to taste, I like lots of spice)

1 tsp ground ginger

1 tsp. ground cloves

1 1/2 cups brown rice flour

1  cup sweet sorghum or millet flour

1 1/2 tsp Xanthan Gum

1/2 cup soy flour

2 tsp baking powder

1/2 tsp baking soda

1 tsp salt

2/3 cup your favorite chopped nuts (optional)

1/2 chopped dried cranberries  + 1 tsp. granulated orange peel (optional)

Using an electric mixer, cream butter and sugar.  Add eggs or egg replacer and mix well.  Add pumpkin, oil, flax and spices and mix well.  In another bowl, stir together flours, leavening, salt and xanthan gum.  Adding a 1/2 cup at a time, slowly stir in dry ingredients (do not worry about over mixing, as you would with wheat flour quick breads).  Stir in nuts and berries if using them.

Spray a standard sized loaf pan with Pam-type spray (or you could make these as muffins by lining muffin tins with cupcake papers and proceeding) and fill with your batter.  Bake in the oven at 350 F for approx 1 hour to  an 1hour and 15 minutes (your oven may very from mine which took an hour and 10 min).  Test for doneness with a toothpick or skewer as you normally would.  When done remove from oven.  Cool in pan for approx. 15 minutes before trying to remove the pan and coolng the bread on a cooling rack or cutting board.  Slice carefully and serve with butter (or jam, apple butter etc) toasted or untoasted as per your preference.

From Home Dairying to Home NON-Dairying: Making Coconut Milk Yogurt


We started our adventures in home dairying in 2004 with 2 newly freshened Toggenburg dairy goat does (much like the one pictured), named Cafe au Lait (which means “coffee w/ milk” in French) and her twin sister, Cocoa, and their 1 month old daughters Mocha and Vienna.  Within 2 months we were not only milking for goat milk but also making yogurt and both fresh and aged goat cheeses for cooking.

Fast-forward 7 years or so to when we realized we had a major problem with our son Charles and dairy products.  I began making “ice cream” with soy, almond or coconut milk and buying “Rice Shreds” mozzarella subsitute for family pizza night (it still had a little bit of casein, but it was the only thing close our local natural foods grocer could get his hands on for us… thus it was maybe a twice a month type treat to have pizza.)  Charles really wouldn’t eat yogurt and didn’t care for cheese except on pizza… so for a year and a half my stash of home dairying “cultures” (the bacteria used to create yogurt, cheese and other yummy things) sat unused in the back of the freezer waiting…

Anna was born also with a casein allergy issue, but at 6 months old I really felt we should introduce some probiotic foods into her diet, especially when the whole family came down sick with first RSV virus, then secondary bacterial upper respitory infections and everyone got put on antibiotics (they have their place in treatment of bacterial infection, but they wreak havoc on your digestive system, killing off beneficial “good bacteria” the body needs to properly digest foods.)  So I started researching “yogurts” I could make using some of the alternative plant-based “milk” products that are available.

After looking at a lot of recipes and combining several I thought would work best I came up with the following: (For the sake of simplicity, we will assume you have a yogurt maker device and know how to incubate yogurt in it.  If you don’t have such a device and don’t know how to make yogurt with improvised tools, please search the Good Eats archives on www.FoodNetwork.com, Alton Brown did several good episodes on this topic.)

Coconut Yogurt Base

2 cans of coconut milk (full fat is best)

1 envelope Knox gelatin

1 pkt of yogurt culture (some good sources are www.leeners.com and New England Cheese Making)

Upto 3 TBSP Stevia in the Raw or Raw Sugar to taste (optional, to make this “savory” yogurt base for dips and such omit sweetner and proceed as directed)

Open both cans of coconut milk.  Pour the 1st one into a mid-sized mixing bowl or 4 cup pyrex measuring cup (leaving plenty of room to add the other can of coconut milk later and stir it well). On top of the room temperature coconut milk in the bowl,  sprinkle the dry Knox gelatin and allow to bloom for at least 5 minutes.  Pour the second can of coconut milk into a saucepan (add your sweetener if using) and heat this to a boil stirring constantly to prevent scorching the  coconut milk.    Pour the hot coconut milk into the cool coconut milk slowly while stirring.  Stir until the gelatin completely disovles.  Allow to cool on the counter top (cover with foil or plastic wrap if you like) back to almost room temp (between 70 and 0 degrees F).

At this point the gelatin may have cuased it to thicken somewhat.  Gently stir in the pakcet of yogurt culture with a plastic or wooden spoon (do not use metal, as it can react with the culture and the milk and prevent your yogurt from setting).  Pour the coconut milk blend into a very clean 1 quart wide mouth canning jar fitted with a plastic “storage” lid.  Place your jar of yogurt into your yogurt maker and follow the manufacturers directions, incubating your yogurt at approx 110 degrees F for 8 to 12 hours depending on how tangy you like your yogurt… the longer it cultures the more tangy it becomes.  It may not look like it will “set”, this is why we added the gelatin (we all know jello sets up in the fridge when it cools, coconut milk also thickens up when refridgerated to a point… together, when this yogurt is refridgerated it thickens up into a beautiful custard-like consistancy… think Yoplait’s custard type yogurt).

You can combine the yogurt with fresh or pureed fruit and vegetable combinations to your heart’s desire and serve as you would any flavored yogurt for breakfast, snacks or dessert.  Savory yogurt you can combine with your favorite herbs and seasonings to make delicious dips for veggies, chips etc or as a sauce on fish, poultry or game meats.  A favorite use in our house is to set the yogurt out to warm for an hour or so and use it as a buttermilk substitute in our favorite gluten-free/dairy-free pancake or waffle recipes.

New Frontiers In Food

As a family, it seems like we’ve been discovering new territory in foodstuffs for a very long time now.  It began in the summer of 2004, several months after we realized our son, Farmer Boy Charles’, allergy to cow’s milk protien at the tender age of 7 months and about a month after moving from Lubbock, TX to Liberal, KS where we purchased an 85 acre fixer-upper farm.  At the time, our pediatricians (both the one in Tx and the new one in KS) encouraged us to put Charles on goat milk, taking into consideration that my nephew was extremely allergic to soy.  We would not know for 4 more years he had autism, although he had exhibited some “odd” behavior to sensory stimuli even prior to birth.

Shortly after we moved to KS, we purchased 2 Toggenburg milk goats, their 1 month old doe kids and an Alpine/Boer cross buck.  I learned to milk and care for the goats, make butter, cheese, yogurt and ice cream and so on.  The goats became beloved members of the family and when we moved again in 2005, this time from Kansas to South Dakota, shortly after the birth of our second child, Farmer Boy Henry, we brought our small herd of 9 goats with us.  In 2006, we began showing the goats in the Open Class Dairy Goat Show at the SD State Fair.  The herd grew, it evolved from an unregistered “grade” herd to a reistered one over the years.  We lost some beloved friends in those years, but through it all, we milked and continued to learn and hone our home dairying skills.

Farmer Boy Charles  was diagnosed in June 2008 with Autism and Oppositional Defiance Disorder at 5 years old.  At the time, he had an extremely limited diet of things he would actually eat, so we spent the next 2 1/2 years resisting the idea of removing certain foods from his diet.  At this time, we were already dealing with 1 child who was allergic to cow’s milk and the other one who was mildly allergic to strawberries and also reacted to artifical food dyes and also had a life threating allergy to beestings.  It was difficult to get our minds around the idea that more dietary revisions might be necessary.

In the fall of 2010, Farmer Boy Charles began tipping our hand in regard to diet.  He’d spent much of the previous summer eating and craving vast amounts of foods that were high in gluten (if it was made of wheat flour, he wanted to eat it… bread, pancakes, cookies, cakes, breaded pre-packaged chicken nuggets and fish sticks and so on) and drinking copious quantities of goat milk.  When the school year began in August, he was suddenly limited to the portions provided by school lunch, school provided morning toast and the afternoon snack that each child brought in his or her turn for the class.  We had no idea the cause at the time, all we knew was that Charles was having these aggressive, angry, violent outbursts in class and becoming dangerous to his teachers and classmates.  Several teachers and his Para managed to injure themselves trying to remove him from the classroom (for the safety of hte other students) during some of these outbursts of aggression.  He would kick, hit, bite, spitting, throwing books, desks and chairs.  It was not only a dangerous situtation, it was also horribly disruptive to the class.  More and more he was being removed from the classroom to the resource room (Special Ed Classroom).  The previous year we had begun charting behavior at school thoughout the day, everyday on a chart, with notations of any changes in routine etc. and part of that charting included whatever he ate at school.

We ended up having to have our annual IEP meeting a month early in order to address his behavior and offically re-assign his educational status from fully-intergrated w/ Sp Ed services in the 1st grade classroom to “self-contained” status in the resource room.  In self-contained, he only got to have contact with his classmates for lunch, library, recesses and music.  Being as autism is to a large degree a disability that includes significant social impairment and dysfunctional social behavior, we as parents and the school staff concurred that Charles needed to continue having some time with his classmates to learn functional social behavior such as imaginitive and cooperative play, turn taking and place appropiated group behavior such as in the library or music class. P.E. was deemed “too much stimulation” since we’d had aggression issues in gym for Charles to participate with his class and he recieved his P.E. in a 1 on 2 class with the gym teacher and his Para, from mid-Oct until the last 2 weeks of school in May.  Slowly he was re-integrated into his class for P.E.

It was during this IEP, listening to the teachers report on his behavior, reading through the behavioral charts of the first 6 weeks of school and the ones from Kindergarten that I started seeing a pattern of escalating behavior that was always at it’s worst an hour or two after lunch and how he had suddenly gotten so much worse behaviorally right after the school term began in the fall.  I started to look for the reason WHY!  What was different??? What had changed???  Was the problem which worsened after lunch somehow food related???

In researching autism and food, I kept stumbling across a theory called the “Autism and Gut Connection”  and a condition called “Leaky Gut Syndrome” that was frequently common in children with autism.  A very simplified definition here: Leaky Gut Syndrome is a condition in which the digestive system can not completely digest gluten (protein found in wheat, rye and spelt) and casein (protein found in ALL mammalian milks, including cow milk, goat milk and human breastmilk… I know just when you think you were doing the right thing and being a great mom by breastfeeding your baby, right?)  These proteins are only partially broken down into protein peptides (rather than to the point of amino acids as they are supposed to) and are absorbed into the bloodstream this way (which they are not supposed to do) where they travel to the brain and are recognized not as incompletely digested proteins, but as OPIUM-LIKE substances!  (Totally scary when you are a parent and you realize the food you’ve fed your kid for years was turning him into a drug addict… I mean, you learned in school you are supposed to be eating x number of servings or grain, y number of servings fruits and vegetables, z number of servings of meat and so on… so you do that because you want to be a great mom or dad… never once realizing that what you are supposed to be doing right is making your child really really sick!)

Having grown up with several extended family members with drug addiction issues,  I quickly realized when I started researching food and autism together that my son had an addiction problem to both gluten and casein and the aggression issues we were fighting at school were just symptoms of drug withdrawl.  I made my husband, Modern Pioneer Pa (aka Rob), read what I was reading about this food connection and convinced him we needed to try the Gluten-Free/Casein-Free diet with our son.  Pioneer Pa finally agreed to give me 1 month, to test the theory and see if we got a reaction from Charles using the elimination diet and challenge technique.  So I proceeded to find some GF/CF cookbooks at the library and begin the adventure into the New Food and Cooking Frontier!

After 2 weeks on the new diet, we saw some incredible things happen.  We did not tell the school what we were doing, we just started sending ALL lunch and snacks from home and told them he wasn’t allowed to have ANY school or student provided foods… home food only.  Charles went into a severe withdrawl mode, complete with irritability, shakes, fevers and sweats and violently aggressive behaviors that were geared toward getting his food fix… his drug of choice.  At one point, he pulled a steak knife out of the knife block and demanded Pa to make him “regular” wheat bread toast at knife point.  This drove home the point to Pioneer Pa that we were indeed on the right path and that his oldest son had a severe addiction problem regarding food.

To backtrack just a bit, in 2008, I had begun using our excess goat milk to craft soaps, lotions and other bath products that I was selling online and at local craft shows and farmer’s markets.  Charles’ addiction to gluten and casein was so bad at this point that he could not even tolerate bathing with goat milk soap or using my insect repelling goat milk lotion/sunscreen product.  We began him on the GF/CF diet the 3rd week of October 2010, and as a point of solidarity, I, Modern Ma, joined him on his diet fully (with his father and younger brother joining us in our diet for suppers and on weekends, with Pa eating his regular bread sandwiches at work and Henry having sack lunch or school lunch at school.)  Shortly after going gluten-free and dairy-free with Charles, some skin and bowel related symtoms I’d been having  for several years (since my pregnancy with him actually) began to clear up too.  It took from October to the end of February to get Charles “clean and sober”.  Along the way there were some incidences that were particularly reinforcing of the importance of this diet to extended family members… most notably my in-laws during our family trip to Colorado for Thanksgiving in Nov. 2010, just a month after we started the diet.

My mother-in-law had taken my nieces and I shopping in Pueblo, Co.  (The previous night I’d made a large batch (thinking the leftovers would be supper the following night) of GF/CF corndogs in the “Corndog R”… a small appliance that is similar to a waffle iron that makes corndogs…( you can find one by searching “corndog makers” on www.amazon.com, it’s probably been one of the best uses of $25 I’ve ever spent, given Charles’ preferences toward “commercial/fast food type foods”), well leaving the guys (the hubby, sons , nephew, brother-in-law and Gramps) home alone is not so smart as it turns out… they ate all the corndogs for lunch.)  Us girls were kind of late getting back from our shopping trip and did not realize the corndogs for Charles’ supper were gone.  My nephew, who has Asperger’s Syndrome and is also a picky eater, and my younger niece who has a tree nut allergy wanted pizza… so grandma made them pizza and used up all the cheese she’d had.  Remember this was early in our going GF/CF… we were still allowing a little cheese once in a great while because Pa didn’t want Charles becoming lactose intolerant… and he was one of those dads “oh well, one meal off the diet isn’t going to hurt him”… so Pa told his mother it was okay for Charles to eat the wheat based pizza w/ his cousins.  WRONG!

That night Charles started stimming (self-stimmulating with repetitive behavior) out of control, being grumpy and irritable and teasing his cousin, Julian, calling him “Julie” to which Julian is obviously very sensitive to this sort of teasing (I would be too if I were a little boy).  Next morning Charles was coming down with respitory symptoms, nose running out of control, cough etc. in allergic response to food the previous night (Grandma being a nurse wanted to give some cough/allergy syrup so he could rest.)  Charles got aggressive with grandma for trying to treat his “cold”, spitting the medicine in her face, hitting, biting and kicking her.  Pioneer Pa had to pick Charles up and physically remove Charles from Grandma to another part of the house (the basement bedroom in which we were staying), calling Charles’ dog Narcissa to come with him downstairs.  Pa had to sit on the bed (back to the headboard), holding Charles tightly in his lap and having Narcissa lay on Charles legs for 2 hours to get him calmed down enough where the child could be at least civil to his grandmother and cousins.  (Please note that Narcissa is rather small in size for a Service Dog and weighs about 25 lbs.,  her weight seems to produce a calming effect on Charles, as does her very laid back temperment and her just “being there and being “fuzzy”.)

My dear mother-in-law, finally… FINALLY (after 7 years of my trying to convince her) realized thateven mild food allergies are very very serious business.  It took a granddaughter with a life-threatening allergy to nuts and a grandson who is severely addicted to the Opuim-like substances created when he eats gluten and casein to realize this and drive it home in her mind.  By noon,  my mother-in-law had me and my oldest niece ( who’s 13 years old, on behalf of her baby sister) out to the grocery store shopping for safe foods for the kids!

In the 18 months since we started the GF/CF diet there have been charges to our family.  August 2011 brought the birth of our daughter, Anna (aka the Littlest Pioneer Girl).  Anna started out a breast-fed baby, however I’ve never been a good “milk cow”… indeed, had I been a dairy cow or goat, I’d have been culled long ago for poor production.  After losing an entire pound after she was born, her pediatrician pretty much forced us to supplement her and threated to get the government involved if we didn’t.  So we did, just to shut the doctor up.  First we tried goat milk, within 36 hours she was throwing that up, then we tried the hypoallergenic formulas (avoiding soy because of my brother’s son’s severe allergy).  One after another those expensive hypoallergenic formulas met with the same results (projectile vomiting after 36 hours and there after at every feeding) and continued weigh loss… finally the doctor diagnosed Anna with casein allergy (all those hypoallergenic formulas contain “caseinate” the stuff they put in non-dairy coffee creamer to make it “white”) and we resorted to soy formula to supplement.  In the months since, her allergy has gotten more severe and at 5 1/2 months she could no longer tolerate my breast milk no matter how careful I was of my diet.  I was so very sad of this… I was finally having a good breastfeeding experience after my dismal failures with the boys… only to have a baby who could not tolerate MY MILK.  I struggle not to take the rejection of the protein in my milk personally and move on, doing what we have to to feed our kids.

In the year and a half since we first began the GF/CF diet,  I’ve had to learn to cook and bake all over again in new ways.   We’ve accumulated some new (and somewhat uncommon) small appliances and cookbooks and Pa is contemplating growning some of our own “grain” in the family garden, particularly edamne soybeans, sorghum (milo), millet and amaranth.  We’ve changed our food buying habits, away from the packaged gluten-free foods and mixes and other pre-packaged foods (which were very nice when I was relearning EVERYTHING cooking related… but rather expensive) and more toward purchase of basic ingredients we can not grow ourselves due to climate constraints such as brown and white rice that we can grind ourselves in an electric grain mill (one of said uncommon kitchen appliances) and doing more of our own cooking and baking.